
This work is licensed under a Creative Commons Attribution-ShareAlike 4.0 International License.
Photo Editing with Adobe Lightroom
About
Last Updated August 03, 2018
Created by Chelsea Smith-Antonides
Table of Contents
- What is Lightroom?
- Opening Lightroom
- Setting Up to Capture or Upload Photos
- Renaming Photos
- Editing Photos
- OCR
What is Lightroom?
- Lightroom is an editing program that lets users name, edit or process, and add metadata to collections of photographs. You can create catalogs of just a few images, or hundreds of them. This is useful if you wish to capture a primary source journal, book, or manuscript. It’s simple to use, but some instructions are needed to get started. In this tutorial we will look at the basics of how to use Lightroom.
- The link to download Lightroom is located at the Adobe website. You must sign in with an Adobe account to access Lightroom.
Opening Lightroom
- When you first open the program, a pop-up box will appear asking you to name your catalog of images. For this tutorial, we’ll use the name of the book and then an “lrcat” extension, which stands for Lightroom Catalog.
- Once you name your LRcat, Lightroom will open.
- Take note of the workspace options at the top of the screen:
- Library is the default viewing workspace for your images. Here you can change the name of your image, as well as its metadata.
- Develop is the workspace where you can change the coloring, white balance, cropping space, and more.
- Map lets you add a geographical location to your images by selecting them on a map.
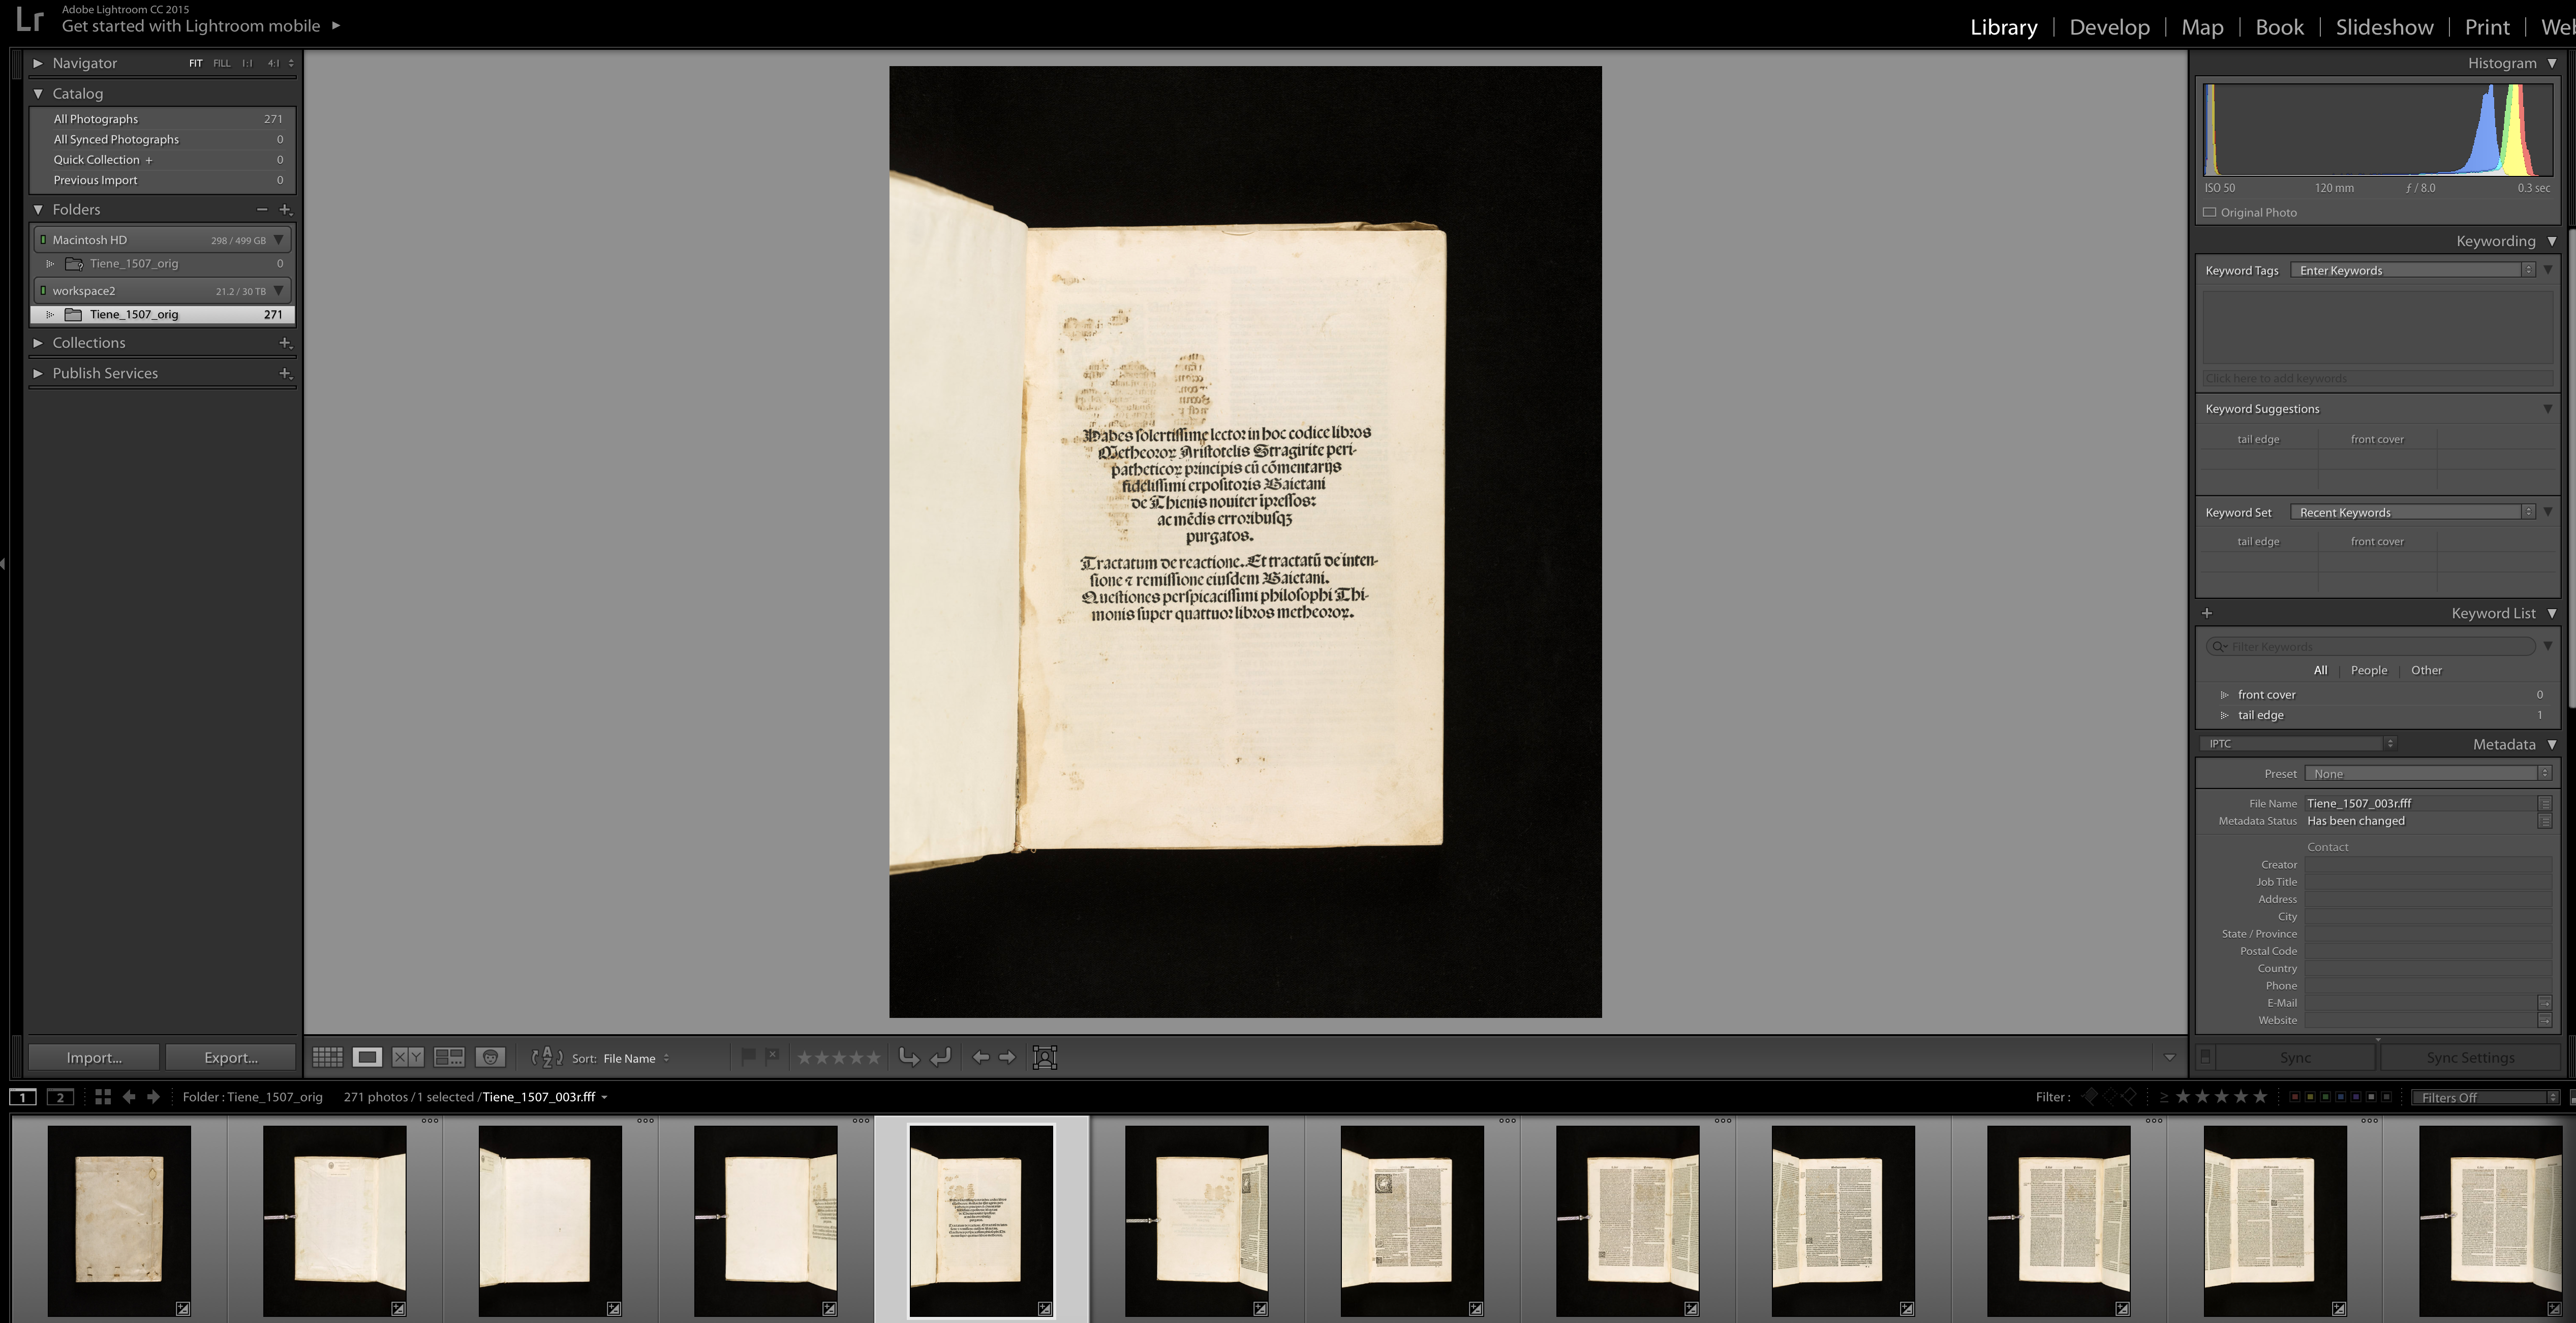
Setting Up to Capture or Upload Photos
- You have a couple of options:
- If you have already captured your images, you can import them quite easily from your computer using the Import button in the lower left corner. Once you select Import, locate the folder where you saved your files. Once you click on the folder, the images will appear on the screen. You can check or un-check boxes if you don’t wish to import everything in that folder. Go ahead and import what you need and then skip ahead to the section on renaming photos.
- If you haven’t captured the images yet, you can set up a tethered capture, which will pull your images into the LRcat automatically as you capture them with your camera. This is very useful if you want to check the quality of your images as you go, allowing you to zoom in far more easily than on a small camera LCD screen.
Note You’ll want to make sure that your camera is compatible with Lightroom. You can access a list of compatible cameras here on Adobe’s website.
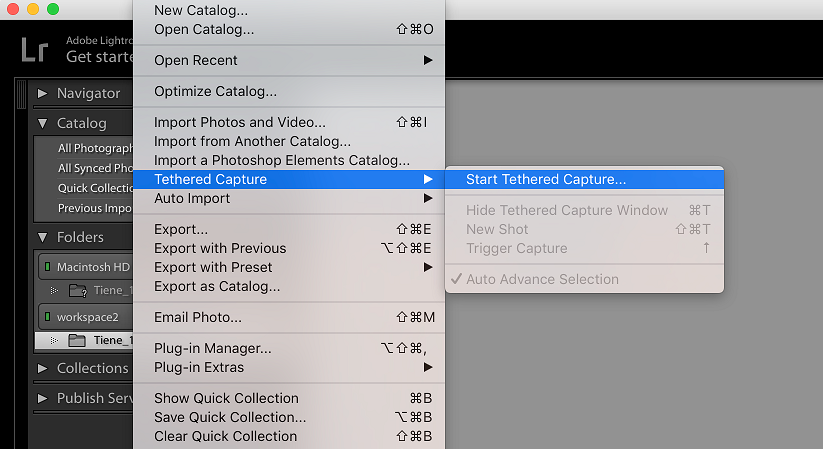
- Attach your camera to your computer with a USB cable. Next, in Lightroom, go to File, Tethered Capture, and then Start Tethered Capture.
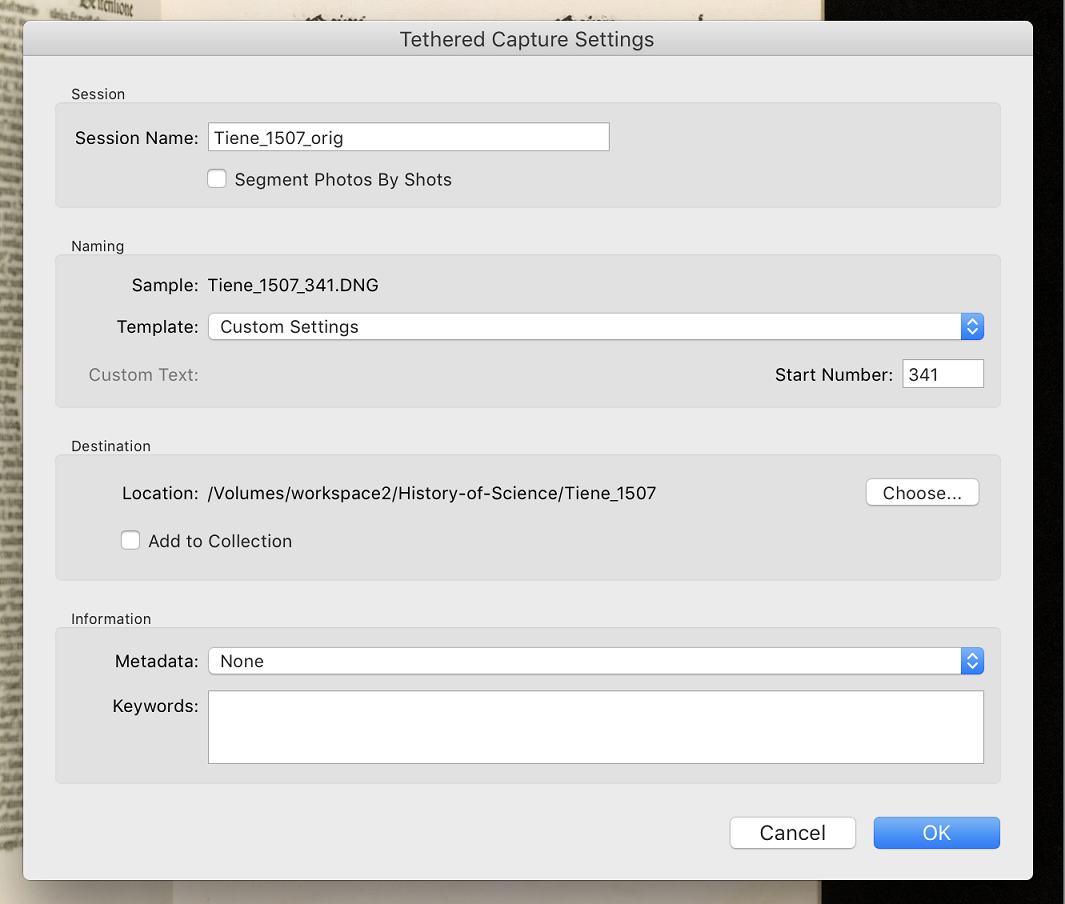
- This pulls up a menu:
- The Session Name is the name of the folder where your images will be kept.
- The Naming section is where you set up your image file names. Sequence puts your images in sequential order, ie image_001, image_002, image_003,… If you want to change how this looks, click the dropdown menu, scroll to the bottom, and then select edit.
- Start Number is usually kept at 1. If you need to delete and re-capture images you didn’t like, you can change this start number to the one you need.
- You can add content to the Metadata section at the bottom if you want all of your images to contain the same information, such as your name or company name. This is something you can easily add to your images later on, so you can leave this blank.
- Start capturing! As you take each picture, Lightroom will import them. It may take a few moments for the image to load properly. After it appears, zoom in and check the quality of your image, making sure that it’s focused. Also check on the color and lighting so that the images are not too dark or too light. Adjust your ISO, aperture, and shutter speed settings as needed.
- To delete images, right click on them in the viewer at the bottom of the screen and then select Send to trash or Remove from disk to ensure your computer does not keep a copy of the image on your hard drive.
Renaming Photos
- You can easily change the name of an image, or a group of images.
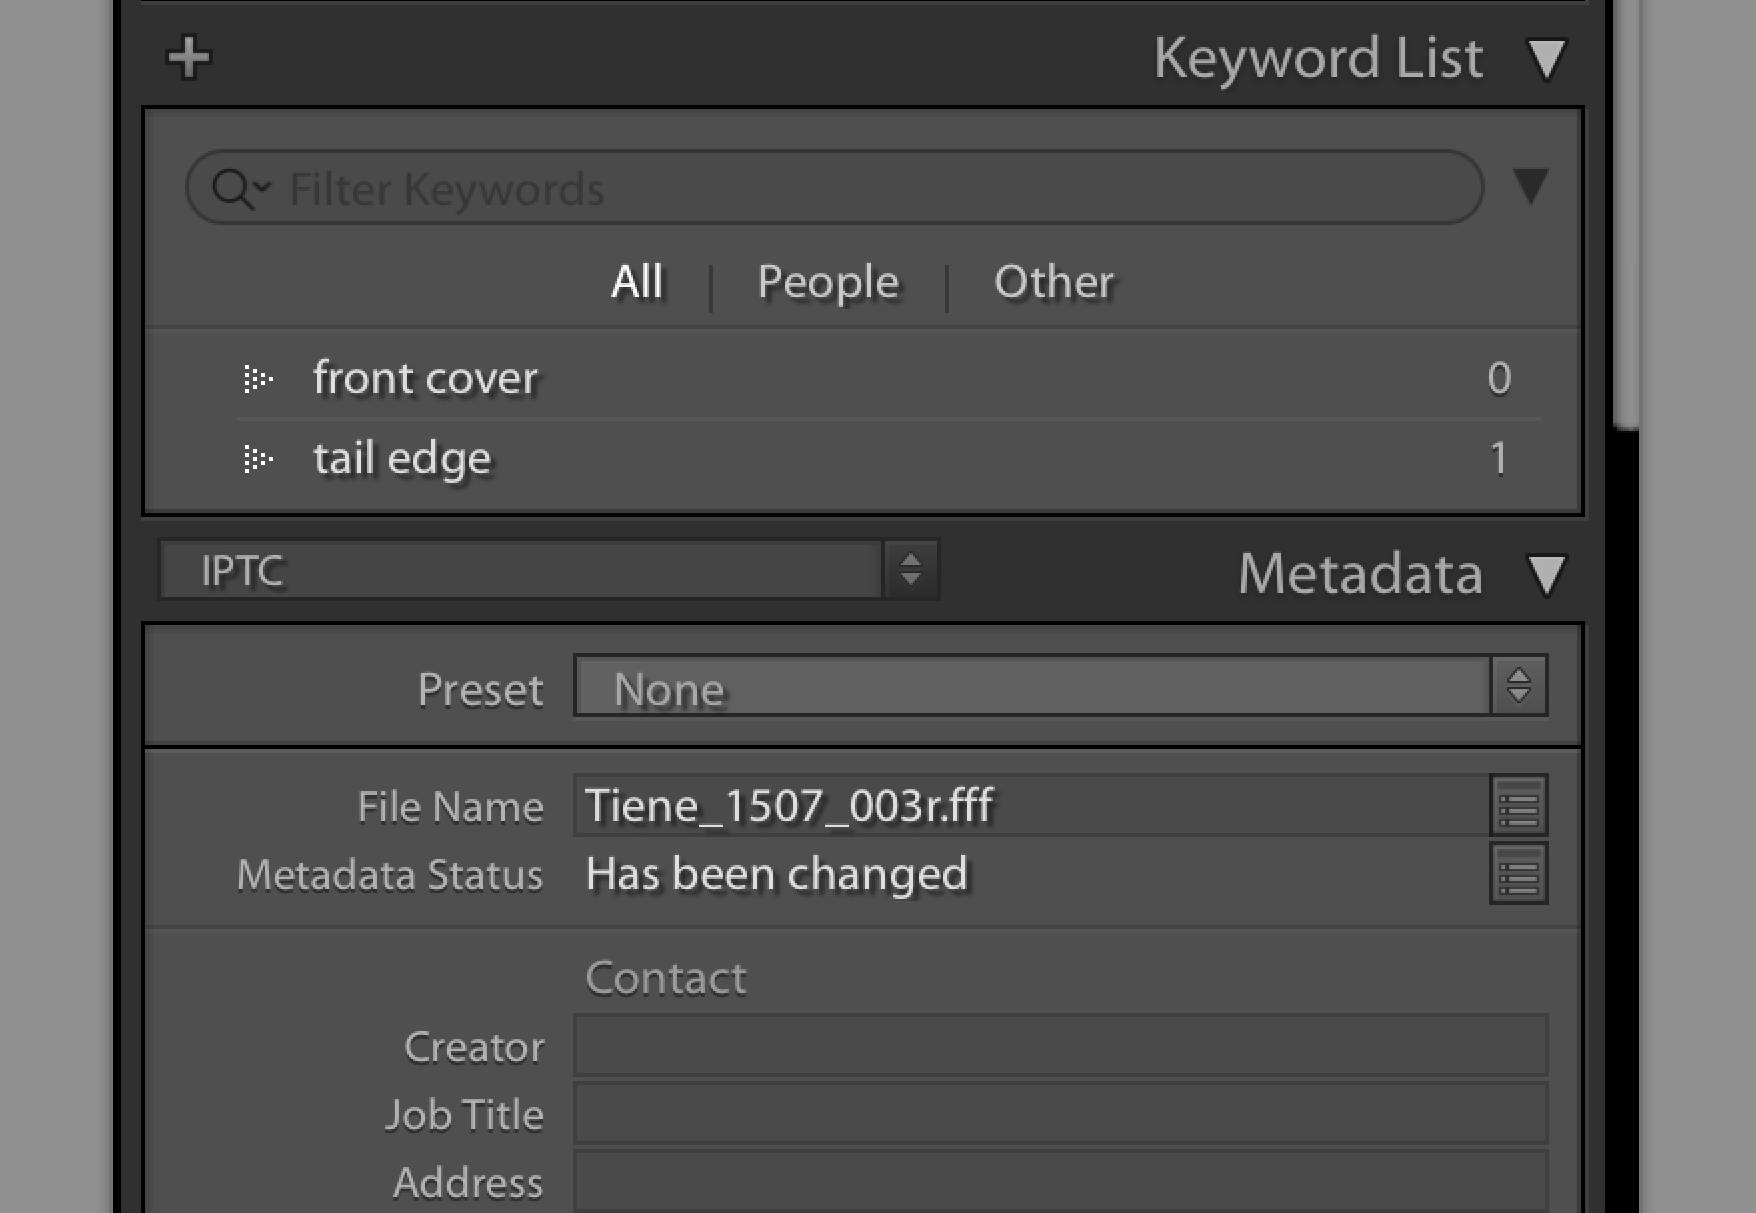
- Select at least one image (hold the shift key to select multiple). Make sure you are in the Library workspace, not Develop. On the right hand side of the screen, locate the File Name box under Metadata.
- You can change the individual image file name here, but if you want to rename a batch of images, click the little toggle button to the right of the file name to pull up a window. This lets you edit multiple image names at once. This is very useful if you’re missing an image, such as a page of a document, and need to insert it into a sequence.
- For instance, if you need to insert an image into a sequence before image_005, select image_005 and all the images after it, select the toggle button again next to file name, and change Start Number to 006. This will create an empty space for your missing picture.
Note
-
File naming is important! If you change file names, do so carefully. If you make a mistake, some names will have a -2 at the end, such as image_005-2. This means that more than one image has the same file name. Track down the images and then change their names to fix this. Other errors include images appearing in the wrong order after you name them. Carefully pinpoint where the problem starts and edit the names until they are properly in order again.
-
If things go haywire, you change the sorting of your images from “file name” to “capture time” and vise versa. This is located at the bottom of the screen here next to Sort:
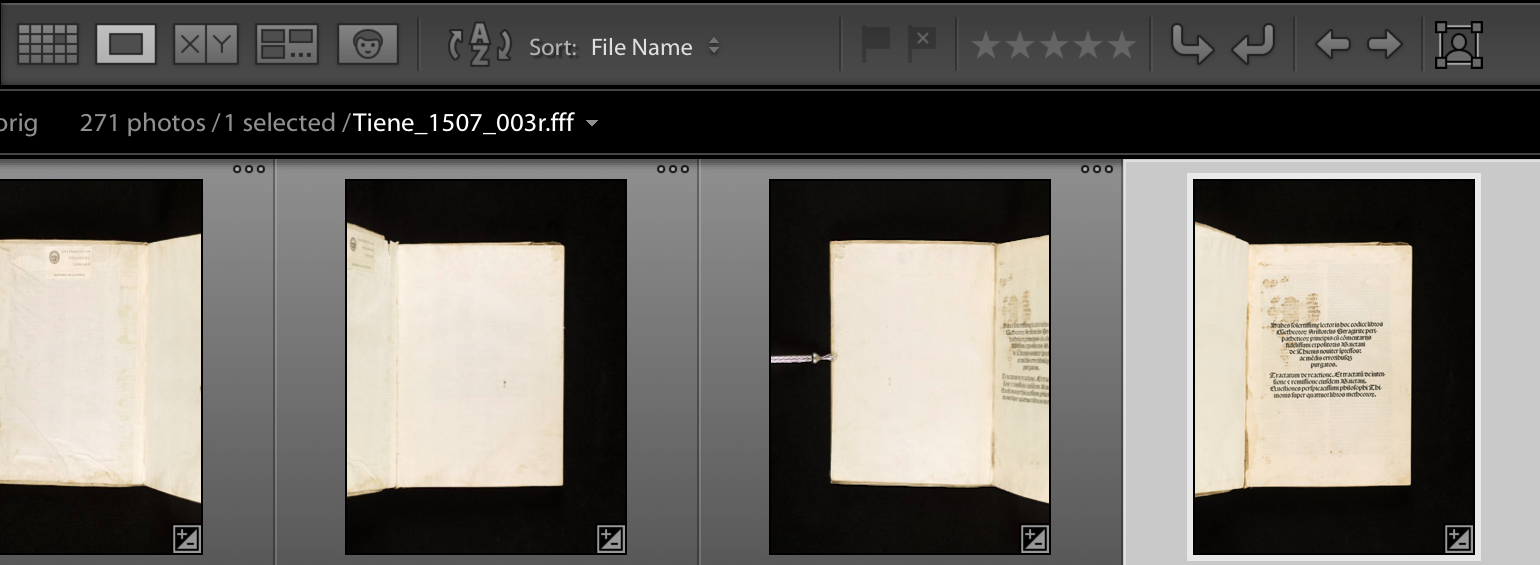
- Capture Time puts your images back into the order that you originally captured them in. From here, you can track down where any naming errors began and fix them.
Editing Photos
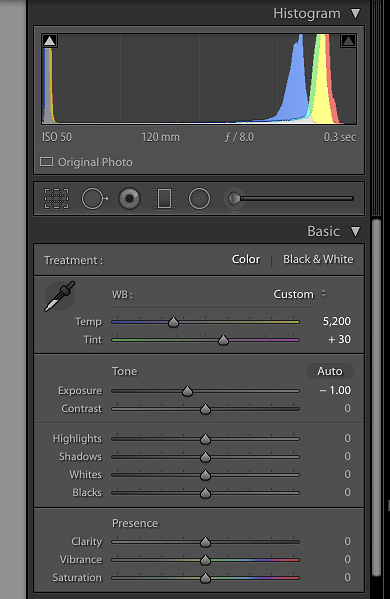
- Go to the Develop workspace.
- From here you can crop your images, change the white balance, contrast, and brightness, among other options. Play around with these settings until you are happy with the look. If the images are still too dark or too bright, change the ISO, Shutter Speed, and/or Aperture settings on your camera and capture these images again.
OCR
- Is there text in your images? Did you capture document, journal or book pages? If you wish, you can turn these images into a single PDF file and make it searchable. With this, you can locate words or phrases in the PDF quite easily. To do this, you need Adobe Acrobat Reader.
- You can read about Adobe Reader here.
- Once you have Adobe downloaded onto your computer, open it. Go to File, select Create, and then Combine Files.
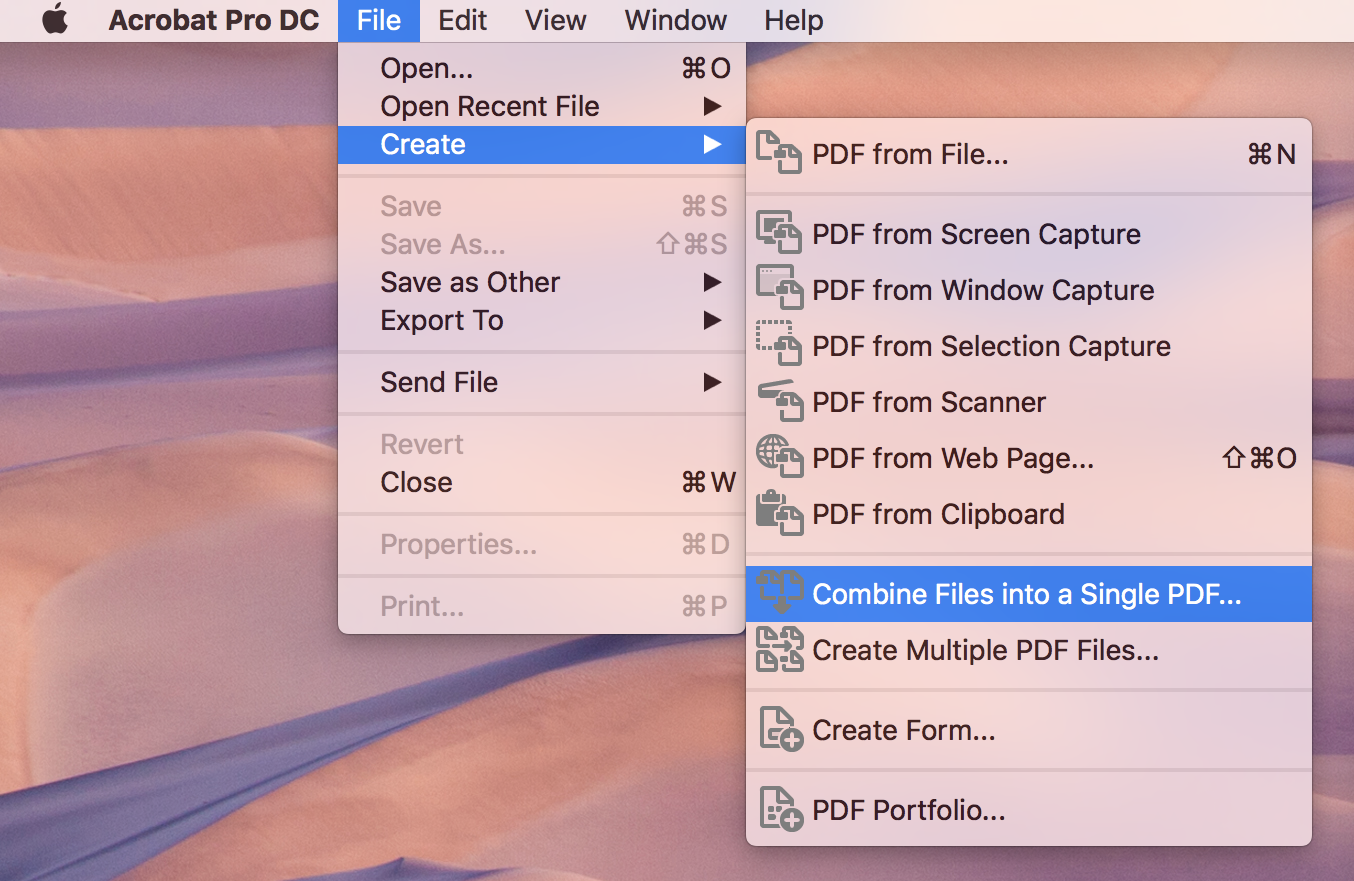
- From here, you want to “combine files into single PDF”.
- A box will pop up telling you to either search for your files or drag and drop them into the box. Do so with your image files, and the box will begin going through each file and prepping them to be combined.
- This may take some time, especially if you have a lot of images to combine.
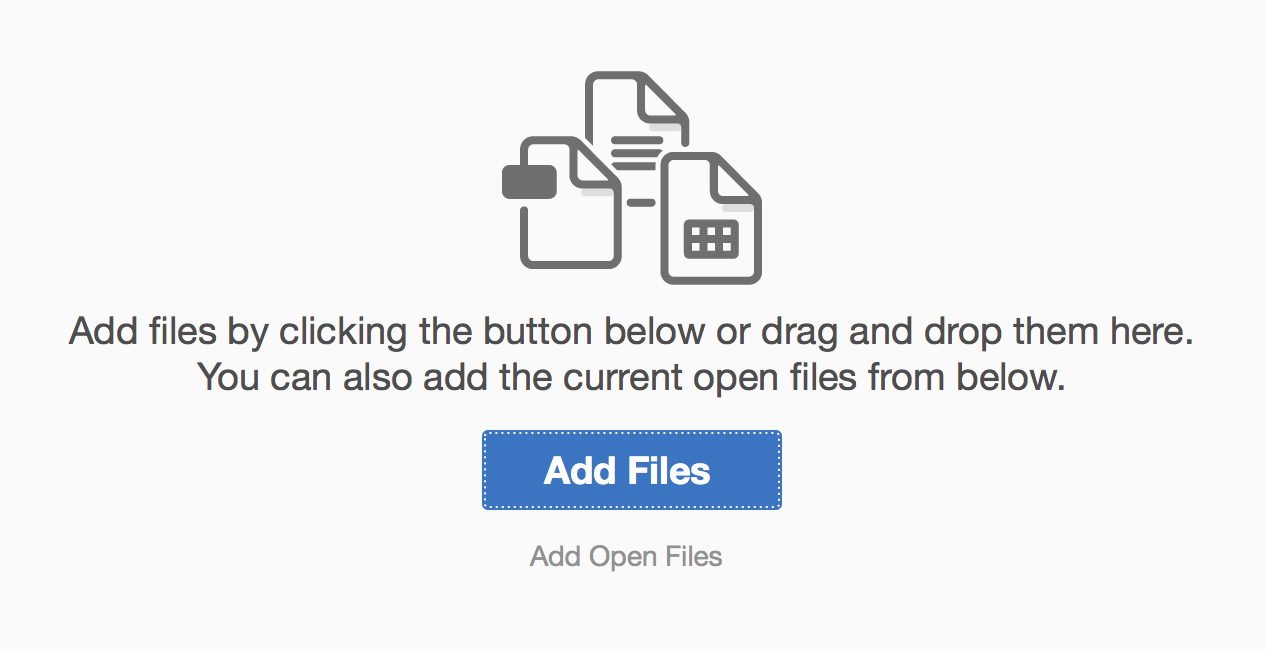
- When the file reader is done, a PDF will appear on your screen with all of your images. If anything is missing or out of order, exit the PDF without saving and try dragging your files to the box again. You can reorder the files in this box if needed.
- Locate the Tools folder in the PDF menu. Search for Original Character Recognition or Recognize Text. The exact name of the tool may vary based on which version of the product you have. You will want to select In this file.
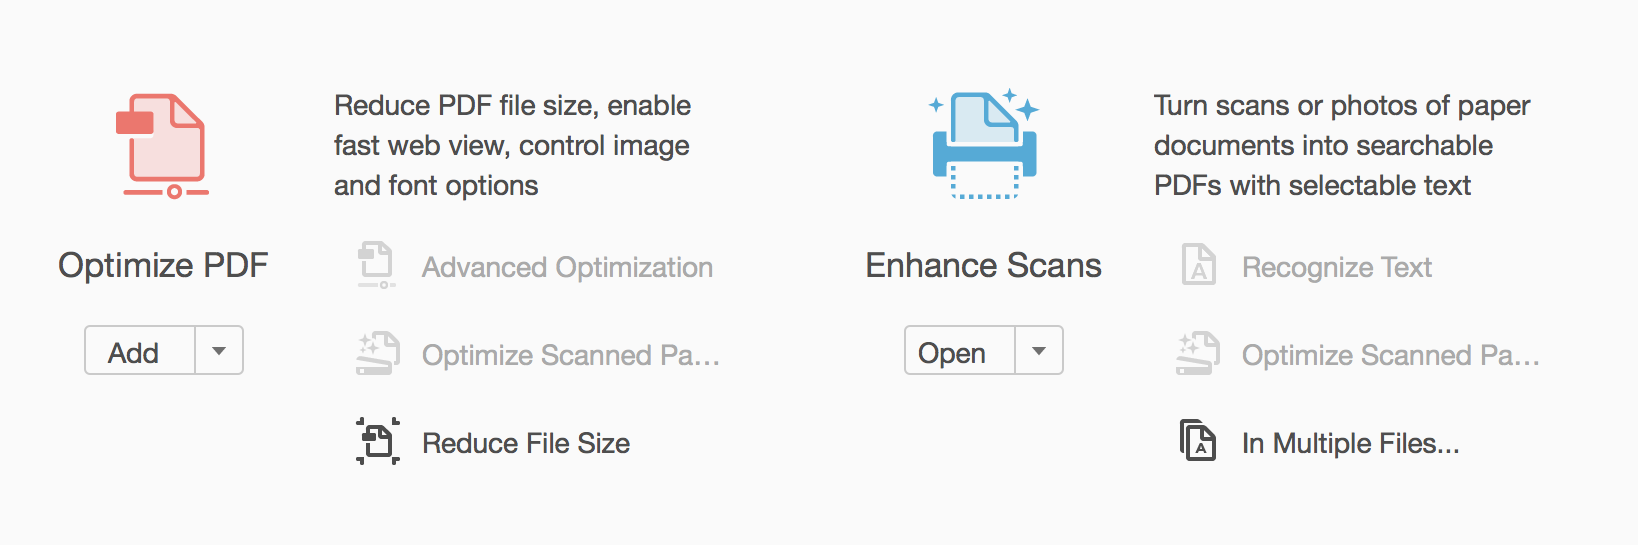
- Adobe will then scan each image, recognizing each letter in each word. This may take some time.
- After it’s done, click ctr + F or Command + F to search your PDF. Try typing a word or phrase that you know is in the document. The OCR should find the word or phrase in your document. If it does not, try the OCR process again.
- Be sure to save your PDF!