This work is licensed under a Creative Commons Attribution-ShareAlike 4.0 International License.
About
Last Updated 20 July 2018
Created by Wendy Jordan |
Updated by Chelsea Smith-Antonides
Table of Contents
What is Timeline?
Timeline is exactly what it says: it is a tool that allows you to create a web timeline and include it on your website. It is created by Knightlab, and is located at https://timeline.knightlab.com/.
Making a Timeline
- After going to the TimelineJS website, select the Make a Timeline button. This navigates you to the step-by-step instructions on using the website to make a timeline.
- First you need to Get the Spreadsheet Template. You will be asked to Make a Copy of the Timeline template spreadsheet to your Google Drive.
- The template spreadsheet will automatically open. You now have the ability to fill in your information for your timeline.
- DO NOT change any settings in row 1.
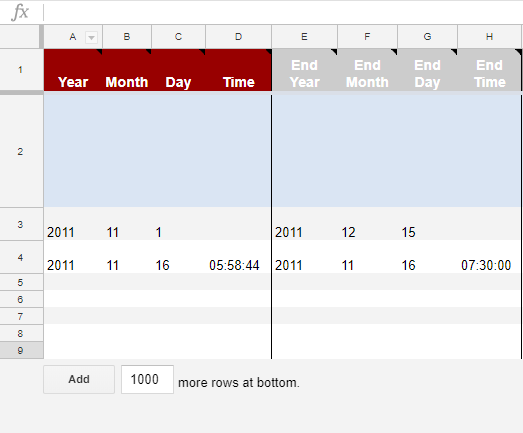
- Each row from 2 on will be a new slide in your timeline. If you need more slides, simply select ADD (blank) more rows at bottom. This is located on the bottom left of your timeline chart:
- The columns across the top tell you what information to place:
- Beginning Year/Month/Time and Ending Year/Month/Date/Time (the ending date is optional).
- Headline is the title that will be shown for that particular row’s slide.
- Text is the body text that will be seen.
- Media is the column to include a link to a picture/video you would like to be shown on the timeline.
- Media credit gives credit to where the media came from, and
- Media caption is the caption that will appear directly under the media (in smaller text than the body text).
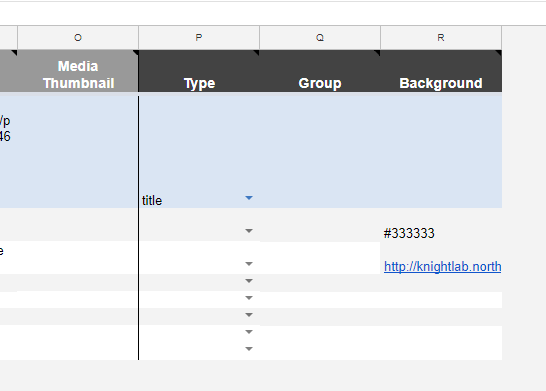
- The final columns, P Q R, allow you to customize the look of your timeline:
- The example given, #333333, is a color hex code that represents a specific color. For example, #333333 is a light gray. These hex triplets can be found all around the web. Look around for a neutral color so that your information is easily readable. Bright colors can distract from your information!
- You can also use an image for your background. Place the url of an image Column R, Row 4.
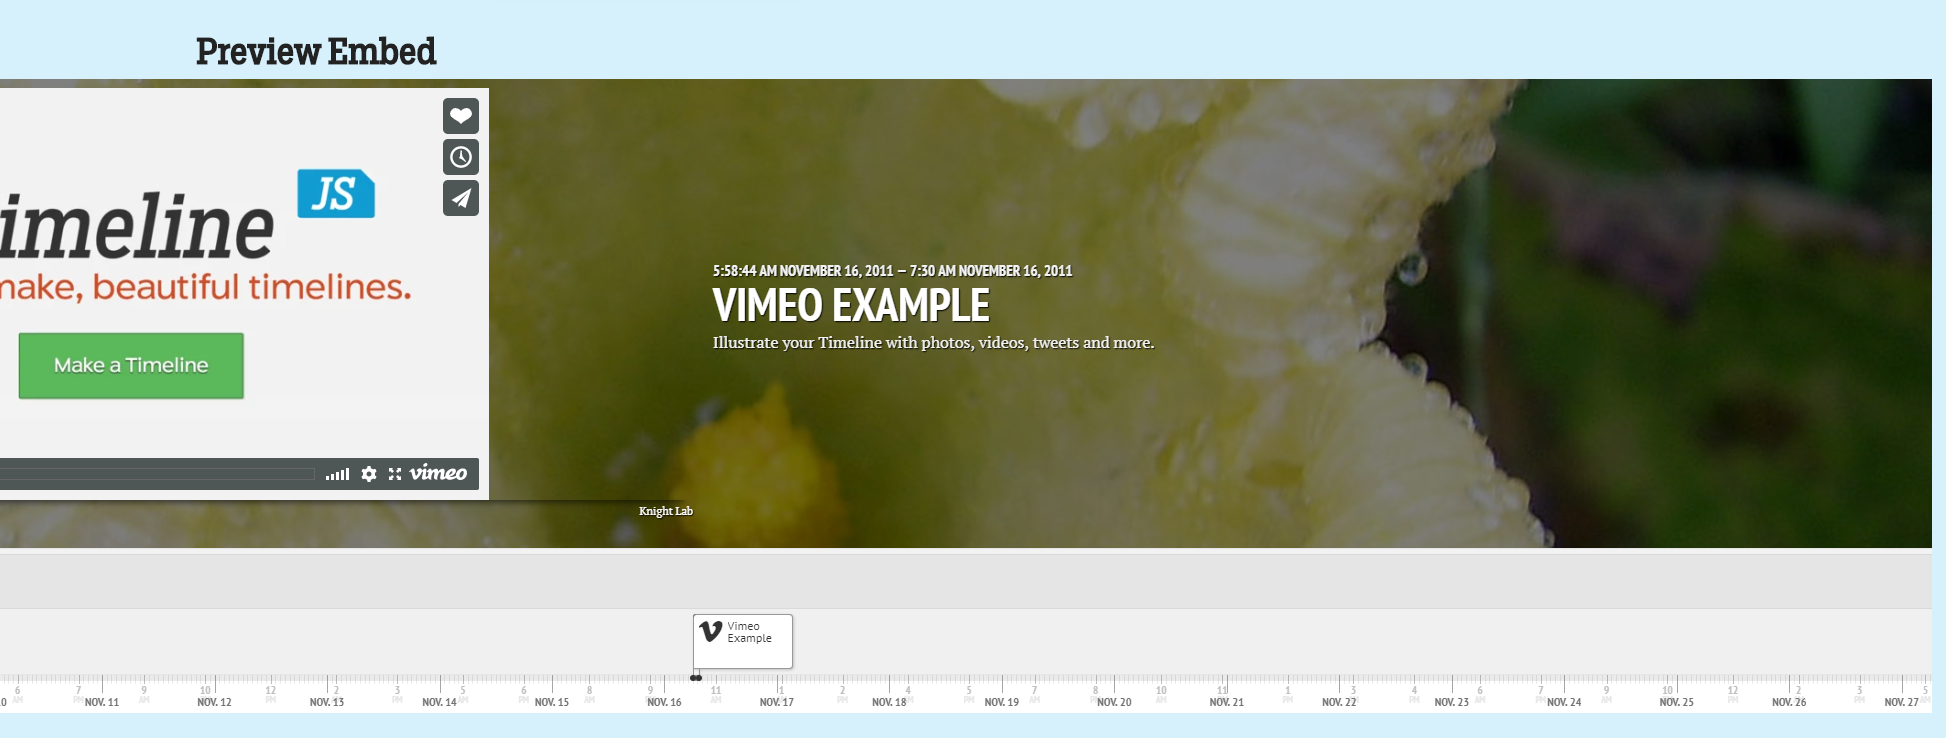
- Here I inserted an image of a flower in Column R Let’s see how it looks below!
- This image is not too distracting, and that’s exactly what you want to look for if you utilize images.
Previewing Your Timeline.
- After filling out your timeline spreadsheet, copy the URL of the page.
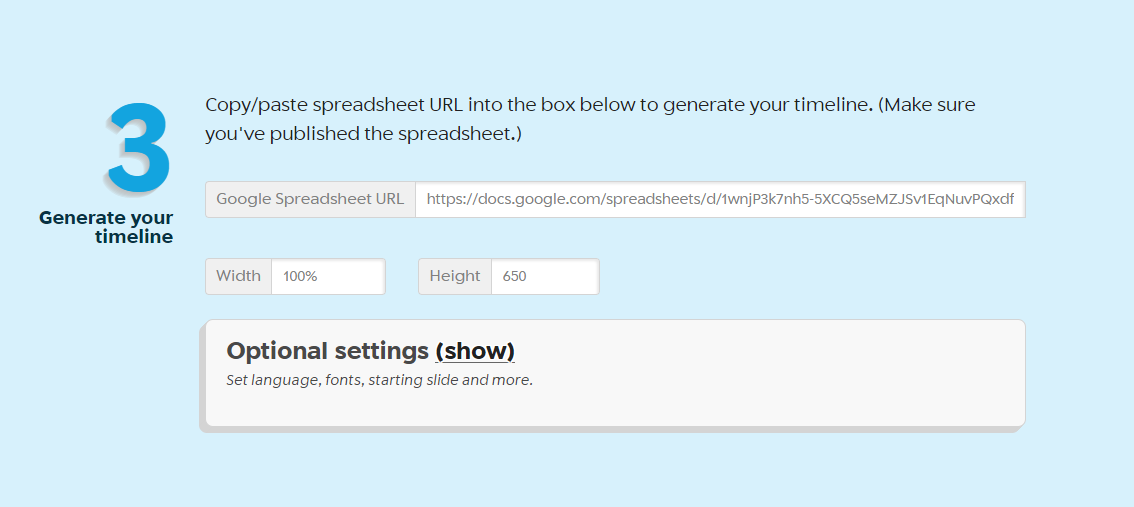
- Navigate back to the Knightlab Timeline page. Paste your URL next to Step 3 in the Google Spreadsheet URL box.
-
Next to Step 4 on the timeline website. Your personalized link and HTML for your timeline has been generated. Click on Preview to preview your timeline below.
-
Note: If you make any changes to your timeline, they will automatically save and update. Just click on Preview again to regenerate your timeline with the changes.
Putting Your Timeline on Your Website
- After reviewing your document, copy the Embed code that was generated for you in Step 4.
- Go to your website’s admin/edit page. Select the page you wish your timeline to be on.
- Make sure that HTML editing for your page is on (there may be an ‘HTML editor’ button for this). Paste your embedded HTML code, and save the changes to page.
- Step-by-step for Omeka Users
- Select the page you want the timeline on: a simple or an exhibit page. Go to the Text box, click HTML Editor.
- Paste your Html code, and click OK.
- Check the Public box to allow the timeline page to be viewed publicly.
- Save Changes to the page.
- Your timeline is now on your Omeka site. You can view the public page that your Timeline is on to make sure you are satisfied with the appearance.
- For extra help with Timeline JS, visit https://timeline.knightlab.com/#help.
- Step-by-step for Omeka Users


